Drawing Stuff On Other Stuff With Deferred Screenspace Decals In Which An Intense Dislike For Graphics Is Revisted
TL;DR
I implemented deferred screenspace decals into the Myre renderer - the open source renderer which powers Heist.
What Are Decals For?
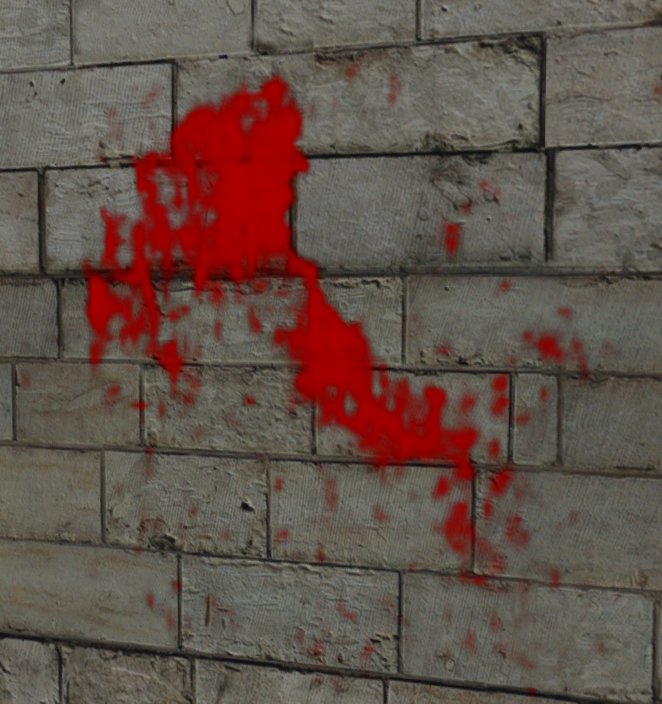
Decals are used in games to draw images onto others surfaces. Every time you see a bullet hole or a blood splatter appear on a surface in a game that’s a decal in action. There are a few ways to do decals which all have different tradeoffs.
Traditional Decals
The traditional way to do decals is to build a mesh which conforms to the surface you want to the texture drawn on, and then to draw the decal onto that. The hard part here is extracting the appropriate mesh once you know where you want your decal, after that you can just render the decal however you render any other texture mapped object. There’s a pretty good overview of this technique over at wolfire.
The advantage of this technique is that you don’t need any changes to the rendering pipeline; whatever system you’re currently using can be used to render your decals just the same as anything else. The disadvantage, of course, if that extracting those surface meshes is pretty complex and you have to keep a load of decal geometry around for as long as your decals live. Furthermore surfaces very close together tend to suffer from Z-Fighting and you can’t get much closer together than an exactly conforming mesh in exactly the same place and so you have to carefully tune fiddly depth biases to prevent flickering.
Megatexture
A megatexture is a way to draw one vast texture over your entire world, initially made famous by Rage and John Carmack. There’s an interesting side effect to this; there’s a unique bit of texture for every bit of geometry in your game. So if you want to draw something on top of a piece of geometry you can just edit the megatexture. Planetary Annihilation uses this effect so when there’s an explosion mark drawn on the ground it’s just drawn into the megatexture and then stays there forever.
The advantages here are pretty obvious, you just draw something into your megatexture and you’re done and even better the decal is there forever! The disadvantage, however, is that you have to use megatextures. I’m not saying that megatextures are bad but they’re complicated to implement and rarely used.
Deferred Screen Space Decals
Screen space decals are an approach that only works in a deferred renderer, this would be a pretty big disadvantage if that didn’t describe basically every modern renderer in existence (including the one I use, which is all I really care about)!
With a deferred renderer when you draw an object you don’t draw out the finished image to the screen, instead you draw out information about the object to each pixel. Things like surface texture colour, depth, normal and shininess all get written into a texture called the GBuffer. Once the GBuffer is complete you follow that up with a series of passes which process the GBuffer information into a finished image. Screen space decals fit right into the middle of this pipeline - they modify the GBuffer and change the data written there. Before and after that it’s just a normal deferred rendering pipeline.
So How Do They Work?
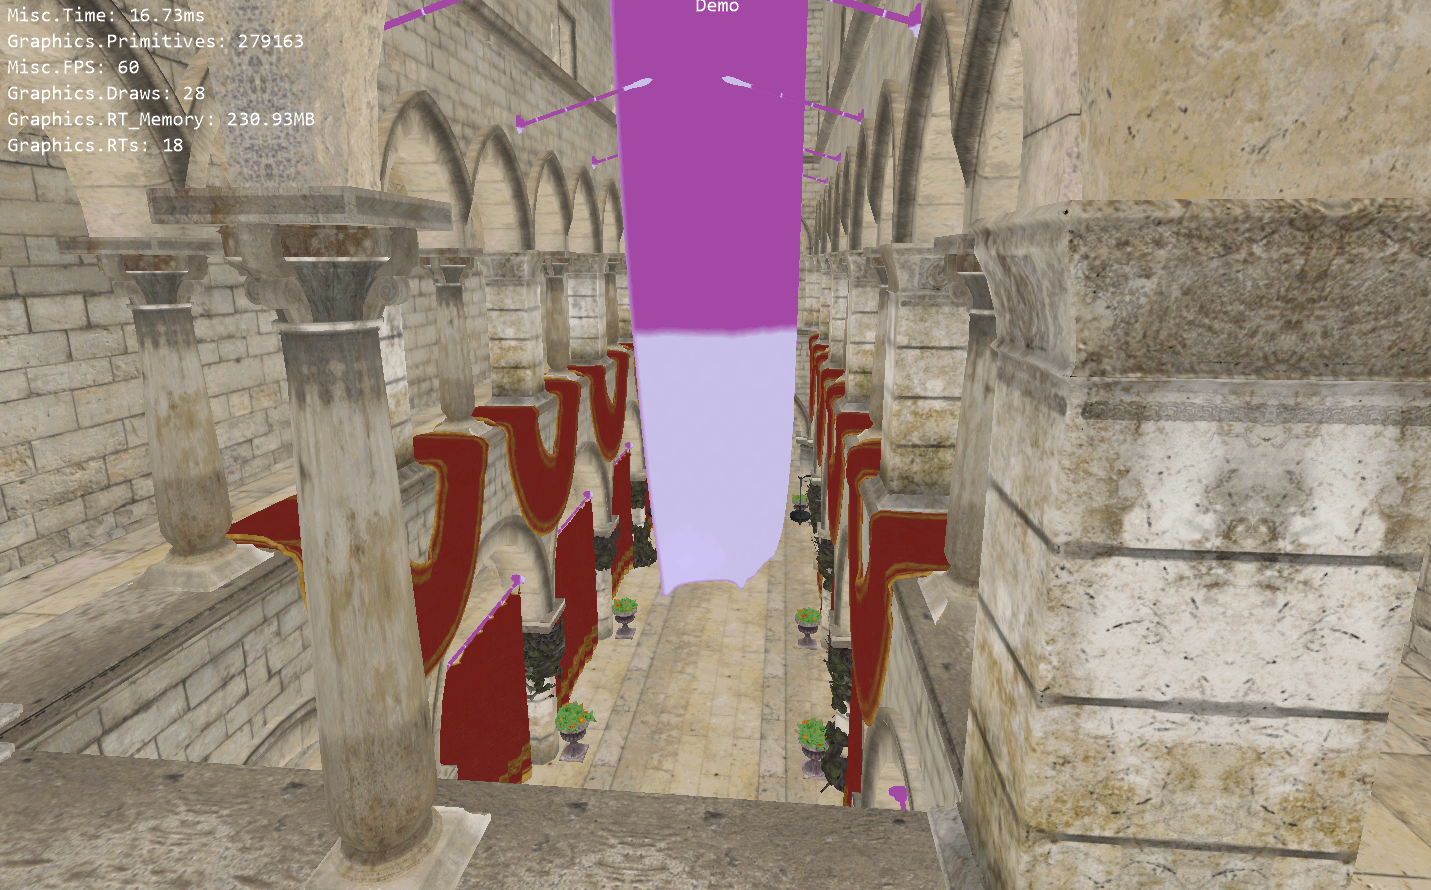
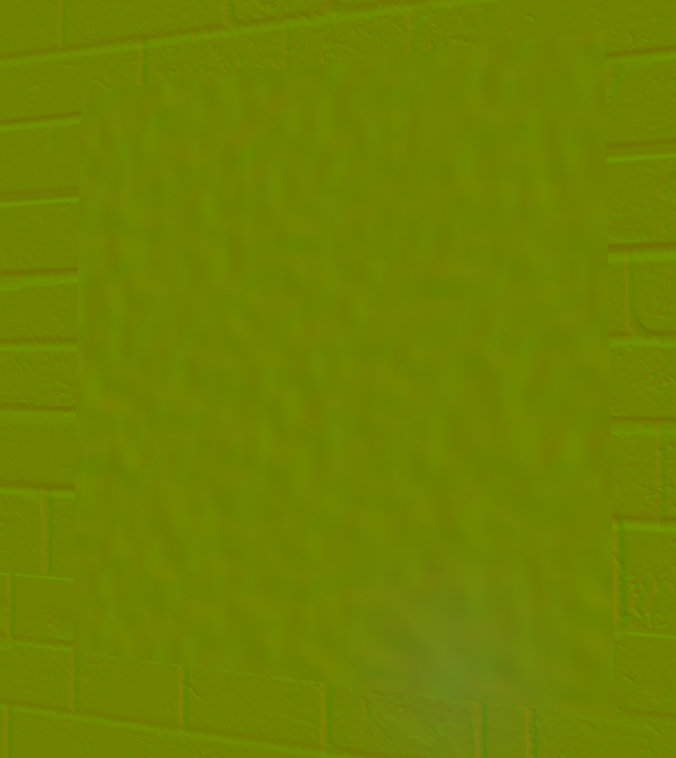
Let’s have a look at the start of our pipeline. First we have our gbuffer with normals, this encodes the a vector pointing straight up out of the surface for every pixel.
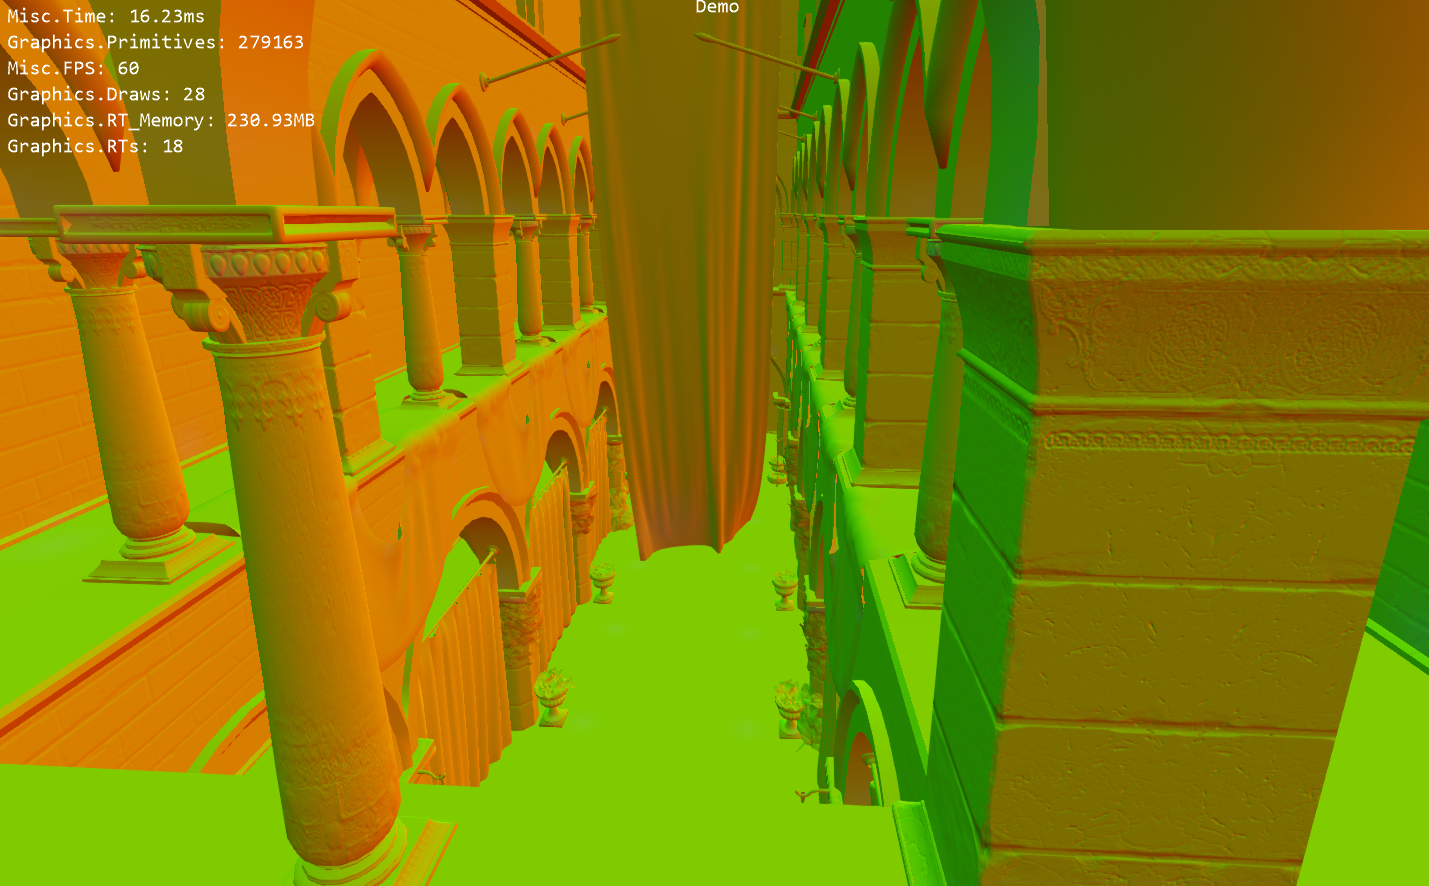
Then we have our depth buffer, this encodes the distance from the camera to the pixel.

And finally we have our diffuse buffer, this encodes the colour of every pixel (from texturing, no lighting or anything like that).
Our decal obviously wants to modify the diffuse buffer (to change the colour of the surface, that’s the entire point) and the normal buffer (slightly less obvious, but it’s important to have normal information associated with decals). Let’s get started!
The first thing we need to do is get some pixels shaded, this is easy: just draw a box where we want the decal.
Note that depth testing is turned off on this box - even though half of the box is behind the wall we can still see it. This is a workaround for a “feature” of XNA4 managing your depth buffers for you; depth buffers in XNA are bound to a texture and cannot be used again without reusing the same texture which is inconvenient here as we’ll see later. My workaround for this is basically to do the depth test myself in the pixel shader but you don’t need to do this, you could use depth testing (read ON, write OFF) just as you usually do.
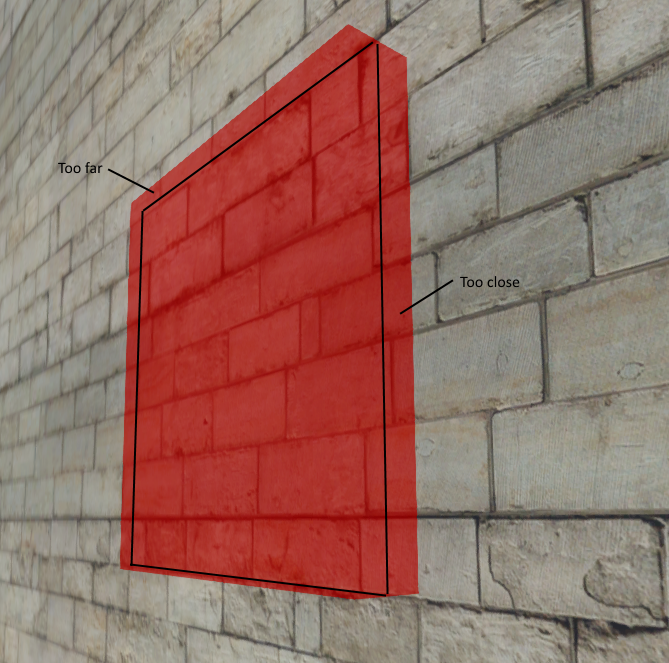
This box is obviously too big, some pixels are shaded red here even though they’re not part of the decal. That’s obviously because the 3D box is just an approximation of the 2D decal we really want to draw and sticks out of the wall.
The black lines all the way around are where the wall overlaps the box. The pixels labelled too close are shaded red but should not be - these ones are closer to the camera than the box. The pixels labelled too far are again shaded red but should not be - these ones are further away from the camera than the box.
We’re going to tackle this problem by working out where every pixel on the wall is in three dimensional space and then doing an intersection check between the pixel and the box. One of the inputs to our decal system is the depth buffer, so if we know the direction from the camera to each pixel and we sample the depth buffer it’s easy to work out the location of each pixel (relative to the camera). This is (in theory) pretty simple:
//Position on the screen
float2 screenPos = positionCS.xy / positionCS.w;

//Convert into a texture coordinate
float2 texCoord = float2(
    (1 + screenPos.x) / 2 + (0.5 / Resolution.x),
    (1 - screenPos.y) / 2 + (0.5 / Resolution.y)
);

//Sample a value from the depth buffer
float4 sampledDepth = tex2D(depthSampler, texCoord);
First we work out where we are on the screen. positionCS is the position of the pixel in “Clip Space”, this is simple to get from our vertex shader (just output the position of the vertex itself). Then we need to convert this from screen space to a texture coordinate. Finally we read a value from the depth buffer which is the depth value recorded for the wall when we drew the gbuffer.
Now we’ve got the depth we need to know which direction we’re looking. This is also pretty simple to calculate from some vertex shader outputs:
float3 viewRay = positionVS.xyz * (FarClip / -positionVS.z);
positionVS is the position of the pixel in “View Space”, this is also simple to get from our vertex shader, just emit the position before multiplying in the projection matrix. FarClip is the distance to the camera far plane and is just here to things correctly (it’s a shader parameter set by the CPU).
Finally we can derive our camera relative position:
float3 viewPosition = viewRay * depth;
I did say that bit was simple! To convert from world space to view space uses the ViewMatrix, it stands to reason that to convert from view space to world space one uses the InverseViewMatrix:
return mul(float4(viewPosition, 1), InverseView).xyz;
Great, we have the world position of the wall at each pixel. Now it’s just a simple bounds check - if the position of the pixel is outside the box we can reject this pixel, if it’s inside the box we should draw something onto it. I implemented the bounds check with some more matrix trickery - the box is a unit box centered at the origin, so if I multiply the world position of the pixel by the InverseWorldMatrix for the box I get the position in object space. In object space the bounds check is trivial - if any element is > 0.5 it’s outside the box!
//Convert from world space to object space
float4 objectPosition = mul(float4(worldPosition, 1), InvWorld);

//Perform bounds check
clip(0.5 - abs(objectPosition.xyz));
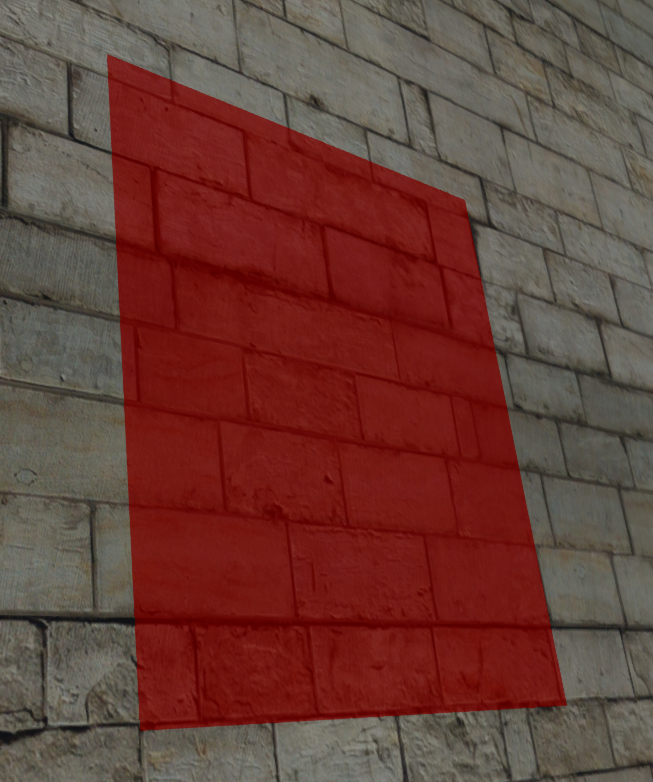
Now that we’ve done all this the 3D box has been flattened into a 2D sheet which exactly conforms to the wall (and would stick just as perfectly to any geometry no matter how complex). Obviously the next step is to draw a texture onto here instead of just shading everything red.
When I moved everything back into object space to check if the pixel lay inside the box I had an ulterior motive; the object space coordinates are (almost) the texture mapping coordinates we need! Calculating the texture coordinate is as simple as:
//Offset from -0.5 -> 0.5 range into 0 -> 1 range
float2 textureCoordinate = objectPosition.xz + 0.5;
That’s it! Now we can draw a texture onto here.
Normal Mapping
That’s great, we’ve got a texture drawn on a surface with arbitrary geometry so we’re done here… right? No, not quite. We still haven’t done normal mapping. This is a bit complicated because normal maps are defined relative to the surface geometry. This is actually pretty obvious if you think about it - a normal map value pointing straight up indicates a normal pointing straight out from the surface… so by that definition normal maps depend on surface shape! These decals (and thus their normal maps) are applied to arbitrary geometry so we somehow need to transform the input normal map from being surface relative to something more useful (world space or view space normals).
What we need is some information about the shape of the surface. Luckily we have the depth buffer as an input which contains all the information we could ever want about the shape of the surface. First, let’s calculate the normal of the surface according to the depth buffer:
float3 ddxWp = ddx(worldPosition);
float3 ddyWp = ddy(worldPosition);
float3 normal = normalize(cross(ddyWp, ddxWp));
Pretty simple! ddx gets the change in worldPosition between this pixel and the next one over (horizontally) and ddx get the change in worldPosition between this pixel and the next one over (vertically). That gives us two vectors which are perpendicular to the surface, the cross product of those must be the normal of the surface at this point.
Per Pixel Tangent Space
Graphics programmers love technical terms which include the word “space”.
Normal maps are defined in “tangent space”. We need to work out a transform for every pixel from tangent space into view space.
This sounds super complicated but it really isn’t. We have the shape of the surface from the depth buffer which is in view space. If we take the three values determined above (ddxWp, ddyWp and normal) and stuff them into a matrix this defines the basis of tangent space for that pixel and conveniently transforms from tangent space into view space!
//Get values across and along the surface
float3 ddxWp = ddx(worldPosition);
float3 ddyWp = ddy(worldPosition);

//Determine the normal
float3 normal = normalize(cross(ddyWp, ddxWp));

//Normalizing things is cool
binormal = normalize(ddxWp);
tangent = normalize(ddyWp);

//Create a matrix transforming from tangent space to view space
float3x3 tangentToView;
tangentToView[0] = mul(pixelTangent, View);
tangentToView[1] = mul(pixelBinormal, View);
tangentToView[2] = mul(pixelNormal, View);

//Transform normal from tangent space into view space
normal = mul(normal, tangentToView);
Not surprisingly, perhaps, it took me a while to work this out! The value can now be written out into the GBuffer and everything after this point is a perfectly normal deferred renderer.
Are We Done Now?
No, not quite. There’s one really big problem with this system which goes all the way back to how we’re initially getting our shader to run on some pixels. We’re drawing a box… but what happens if the camera touches the box? If the camera is inside the box we have a problem because backface culling stops you seeing any of the box (and thus you can’t see the decal). The solution here is pretty obvious; just use frontface culling if the camera intersects the box, you also need to turn off any depth culling that you’re doing. You could possibly just invert your depth test, I haven’t tried that myself though.
Doing this is dead simple, you can just test if the camera intersects the box on the CPU and set up different render states:
//Create a space sphere for the camera bounds
var cameraSphere = new BoundingSphere(position: cameraPosition, radius: cameraNearClipPlane)

//Transform sphere into object space
    .Transform(inverseDecalTransform);

//Check if the camera bounds overlap the decal bounds (unit cube at the origin)
bool cameraIntersectsDecal = new BoundingBox(new Vector3(-0.5f), new Vector3(0.5f)).Contains(cameraSphere) != ContainmentType.Disjoint;

//Setup render states
if (cameraIntersectsDecal) {
    DepthTestMode(None);
    CullMode(Clockwise);
} else {
    DepthTestMode(LessThan);
    CullMode(CounterClockwise);
}
Can I Use This?
Yes! I built this decal system for my game (Heist) but everything detailed here is part of an underlying game library called Myre which is open source and available here. Myre is strongly tied to XNA and is totally undocumented, so I don’t necessarily recommend you start using it for a new project now (but feel free to if you want). However it’s a great source of reference code and it you want the specific decal shader code to tear apart it can be found here and if you want the CPU side of things it’s split between here and here. Good Luck